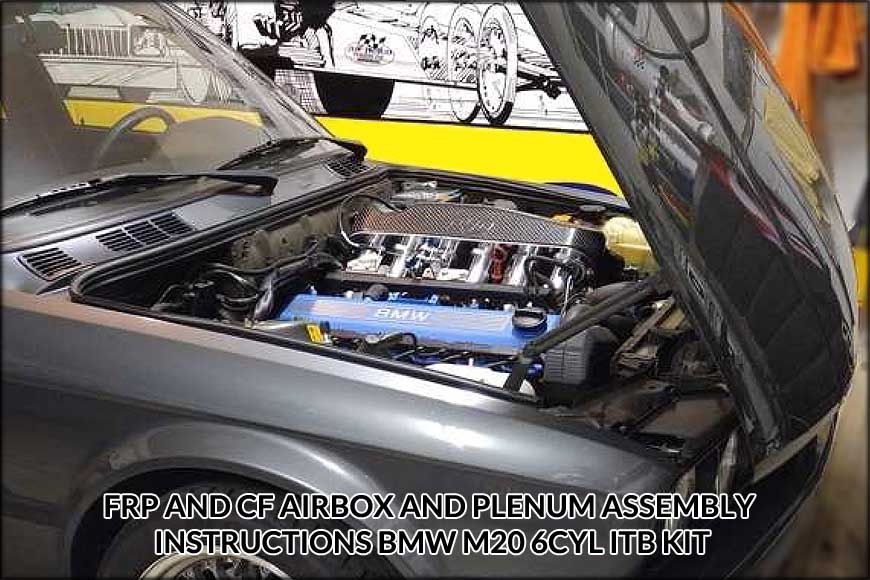
FRP AND CF AIRBOX AND PLENUM ASSEMBLY INSTRUCTIONS BMW M20 6 CYLINDER ITB KIT
ITB KIT DIY INSTALLATION
First Up
Thanks for supporting our products. As you well know the space available is very tight, so the installation will require a moderate level of mechanical ability. We know it does fit and work very well with reports of up to 8hp gains in power!
We have tried as much as possible to make this a direct bolt on item but it’s highly recommended you have access to some basic trade tools or a workshop that can help.
There are many variations in engine mount stiffness and condition so in some cases you may need to shim the LH engine mount slightly to provide enough clearance over the brake booster.
Also if you have been having trouble with the throttle not closing fully or unstable high idle during hot engine or heat soaked conditions this issue has been fully resolved please see our FAQ website page.
Before You Start, there are a few things to check
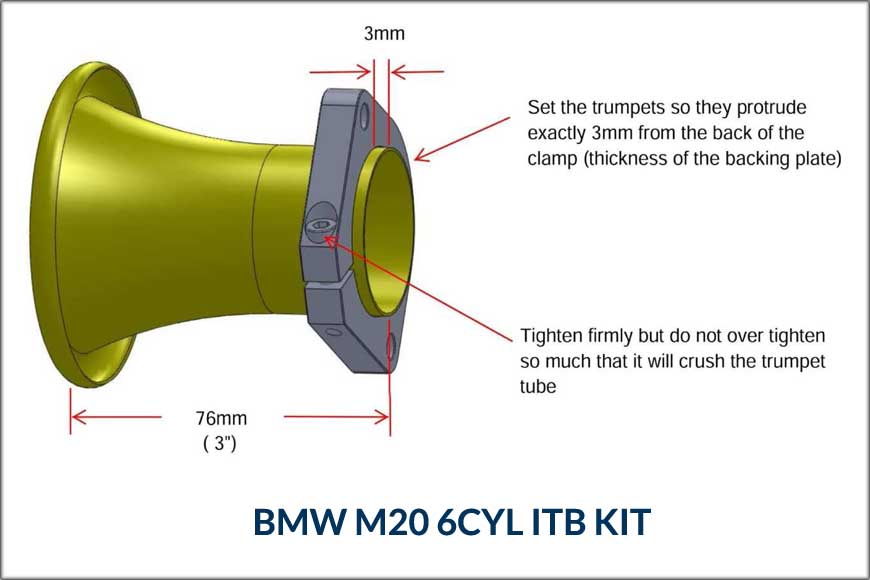
1) You have the right length trumpets! Your trumpets need to be 76mm (3”) total length. If you need to trim them please visit the FAQ section of our website www.racehead.com.au there is a video link showing a quick easy trimming method.
2) You have the correct length spacers! The correct spacer length is 80-85mm, if you have an early series kit the chances are you will only have 50mm spacers so for those needing to change I am offering new spacers at less than half price, please contact us.
3) Your spacers are the correct size for your Kit! If they all came with your ITB kit they will be correct but if you ordered the spacers with the airbox then you should confirm the correct ones were ordered.
Assembly Procedure
Please pay attention to the following drawings and descriptions very carefully they explain EXACTLY the procedure and modifications needed to install your air box. You must have your ITB kit installed first with it operational and synchronized.
1) First you will need to prepare the trumpets. Once you have them to the correct length set all the clamps in position 3mm from the end see diagram on the following pages.
Don’t tighten the clamps just yet.
2) One trumpet will require small modification to the lip to fit correctly this is for clearance above the brake booster on No6 cylinder.
This can be done by hand if you have strong fingers or you may need some pliers and a few layers of cloth rag so as not to dent the trumpet.
Carefully fold the lip of the trumpet under the rolled edge to form a small flat section. If this still does not provide enough clearance then you may need to cut or grind the lip back a little further.
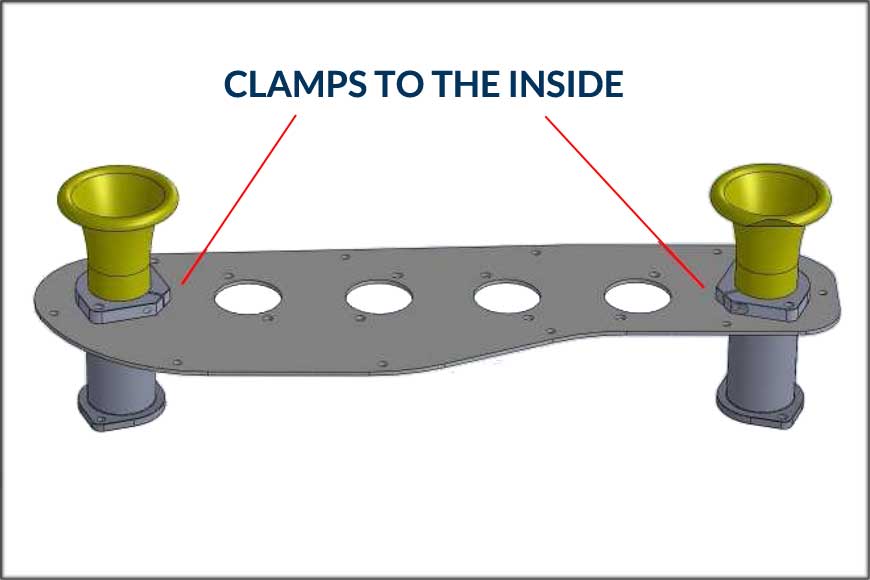
3) Assemble the two end trumpets and spaces to the backing plate with the clamping screws to the inside and the folded lip to the bottom of the last cylinder.
Leave the bolts finger tight.
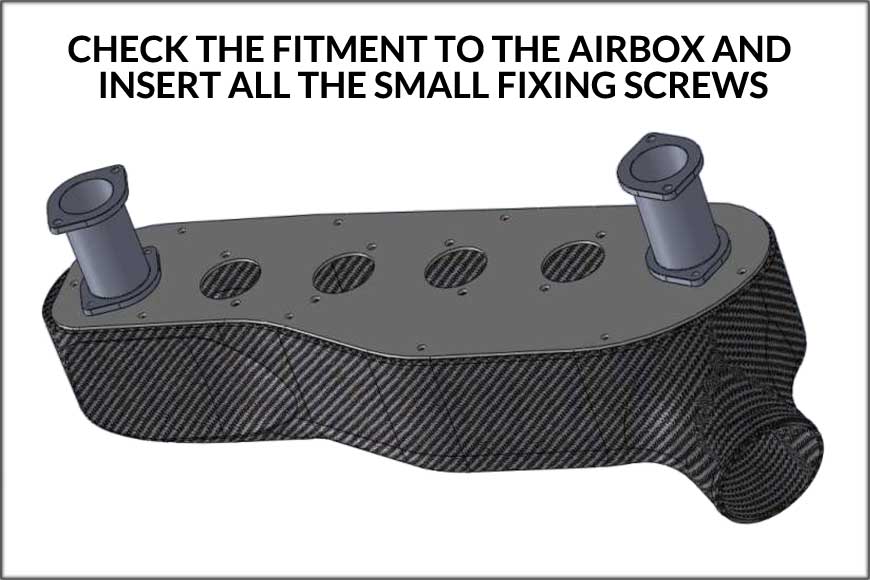
4) Check the fitment to the airbox and insert ALL the small fixing screws a few threads to ensure that all the screw holes line up,
If they do not all insert then you may need to further fold the lip of the last trumpet, or you can slightly enlarge all the holes in the backing plate with a larger drill.
5) Once you have it so that all the small screws can be easily inserted through the backing plate into airbox, remove the backing plate from the airbox and dismantle the trumpets and spacers.
6) Install all the spacers onto the vehicle. Tighten the bolts between the spacers and ITB firmly but not fully just to make sure the O rings are compressed. Start from #6 since it is usually hardest to reach.
7) Install the backing plate and trumpets to the spacers. Leaving ALL the bolts finger tight.
This needs to fit in a relaxed state so if any of the holes in the backing plate don’t line up then they should be enlarged so that all the bolts and trumpet tubes can fit and the
bolts turned in by hand.
The bolt holes and the main runner holes in the backing plate can be enlarged any amount needed since they all get hidden between the spacers and trumpet flanges.
At this time you may want to look at installing IAT sensor, breather tube and ICV hose connection to the backing plate if you are using any of these items.
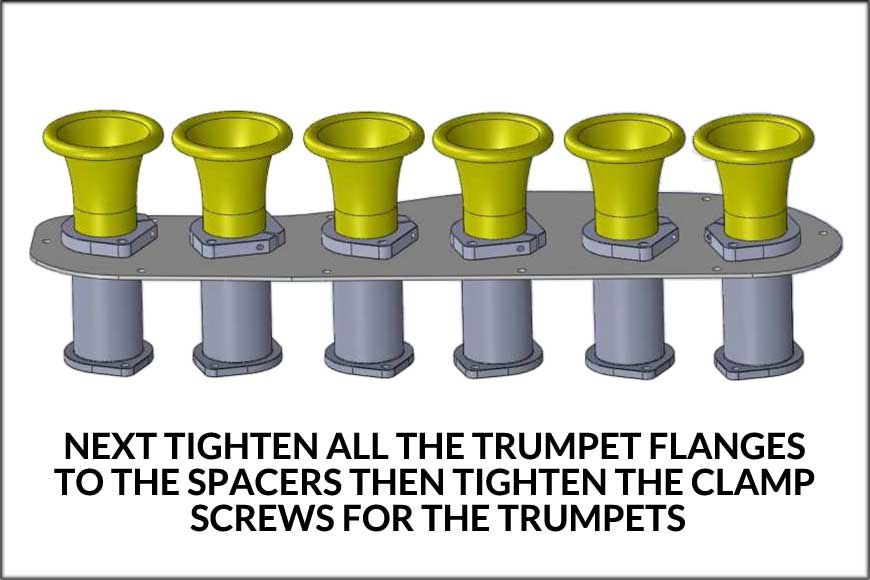
8) Next tighten all the trumpet flanges to the spacers then tighten the clamp screws for the trumpets. It is important not to over tighten the clamps and crush the trumpet tube.
9) You may be able to install the airbox directly by undoing the LH engine mount and jacking up the engine otherwise remove the whole assembly from the ITB’s.
Fit the airbox while it’s off. Be very careful not to cross thread any of the backing plate screws, if this happens you will tear off the tag inside as you try to force the screw. These can be re attached with sikaflex or similar marine grade adhesive.
You may want to use some silicone sealer to seal the airbox to the backing plate since most of the time it will all be removed as one part.
10) Reinstall the entire assembly back onto the ITB’s and if you followed my procedure correctly all the bolt holes should all line up again.
If you still have trouble with the bolt hole alignment then you may need to leave all the airbox backing plate screws a little loose and tighten them up last.

